Mobile application
Using LaborApp on mobile devices
Watch the video
A narrated walkthrough of this module, step by step. The videos are in Spanish.
The employee app
Clock in, request and check, from the phone
1:17Read the transcript (in Spanish)
Cada trabajador tiene LaborApp en su móvil, en Android y en iPhone. Desde la app ficha, pide sus permisos, consulta sus horas y firma sus documentos. Al abrirla, sus saldos de vacaciones y sus últimas solicitudes. Fichar es un toque en el botón: entrada al llegar y salida al irse. O acercando el móvil a una etiqueta NFC del centro. O escaneando el código QR del reloj de fichar. Quien trabaja fuera registra sus desplazamientos, con la distancia y el tiempo en el mapa. Si se olvidó de fichar, pide la marca que falta. Y consulta su historial de fichajes y su resumen horario, mes a mes. Pide sus permisos y sigue en qué estado están. Tiene sus nóminas y sus documentos, y puede enviar uno a su empresa. Y en LaborSign firma los documentos que tiene pendientes, desde el mismo móvil. Esta es la app de LaborApp: todo lo del trabajador, en su bolsillo.
Contents
1. Installation and access
Step 1: Download the application
Search for New LaborApp on Google Play or the App Store and install it by tapping Get.
Step 2: Sign in
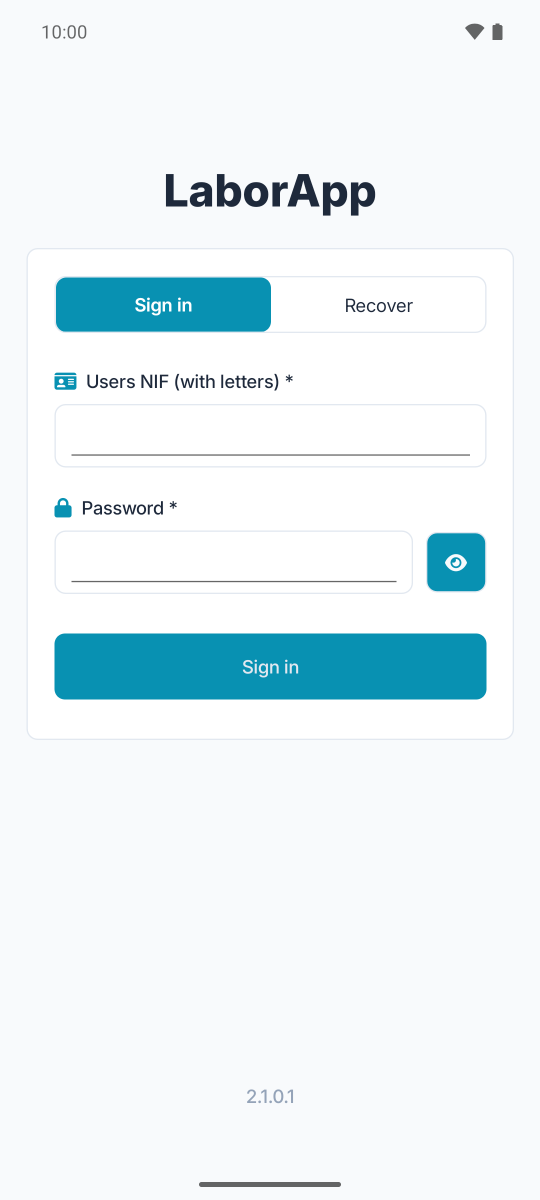
Enter your user name (NIF including the letter) and the password you received by email or from your company, then tap Sign in. The eye button shows the password while you type it.
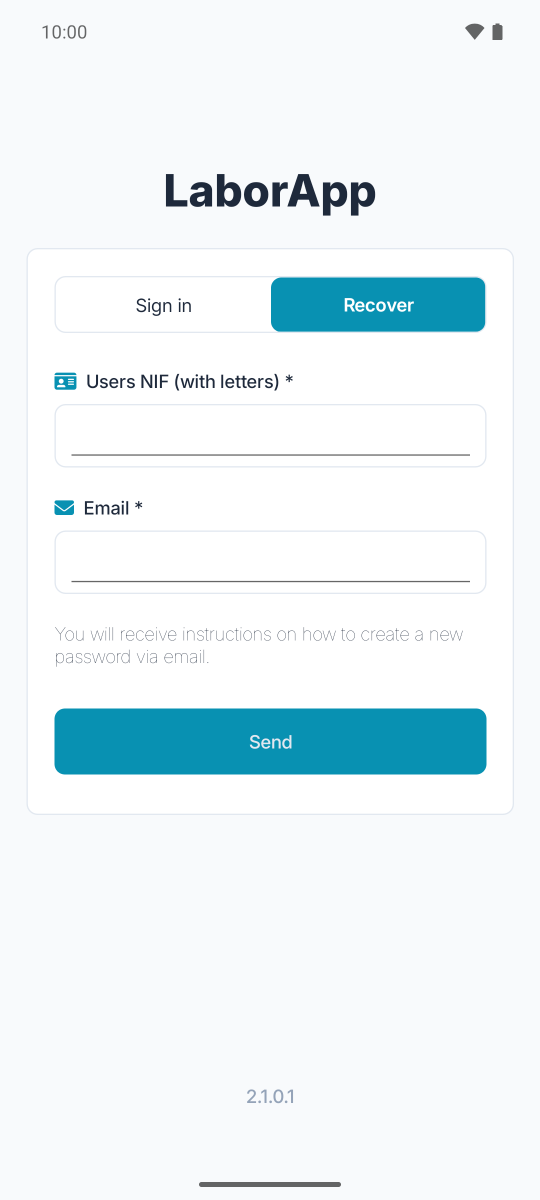
If you do not remember your password, open the Recover tab, enter your NIF and your email address and tap Send: you will receive the instructions to create a new password by email.
Step 3: Phone permissions
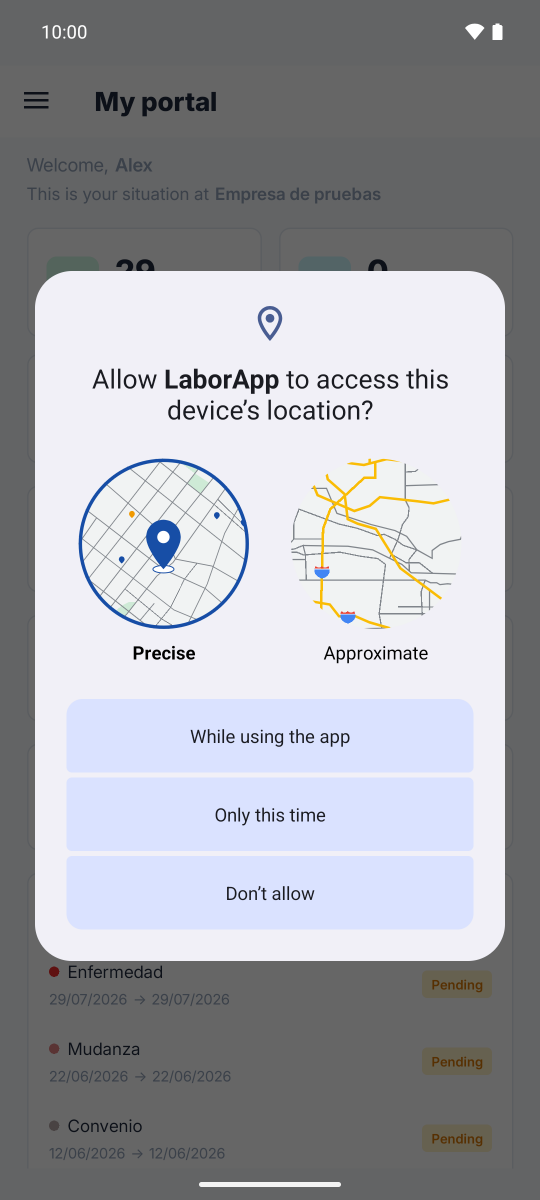
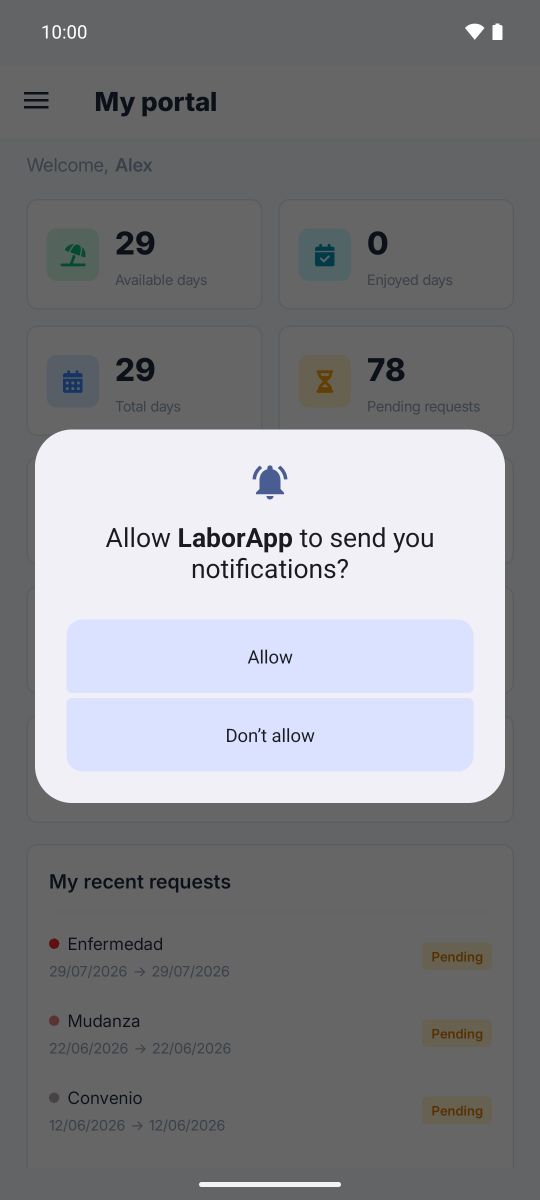
The first time you sign in, the phone asks whether LaborApp may use your location (for clocking in and displacements) and send you notifications (synchronisation notices and the displacement in progress). The camera is requested later, the first time you photograph a document or scan a QR code.
2. Home: My portal
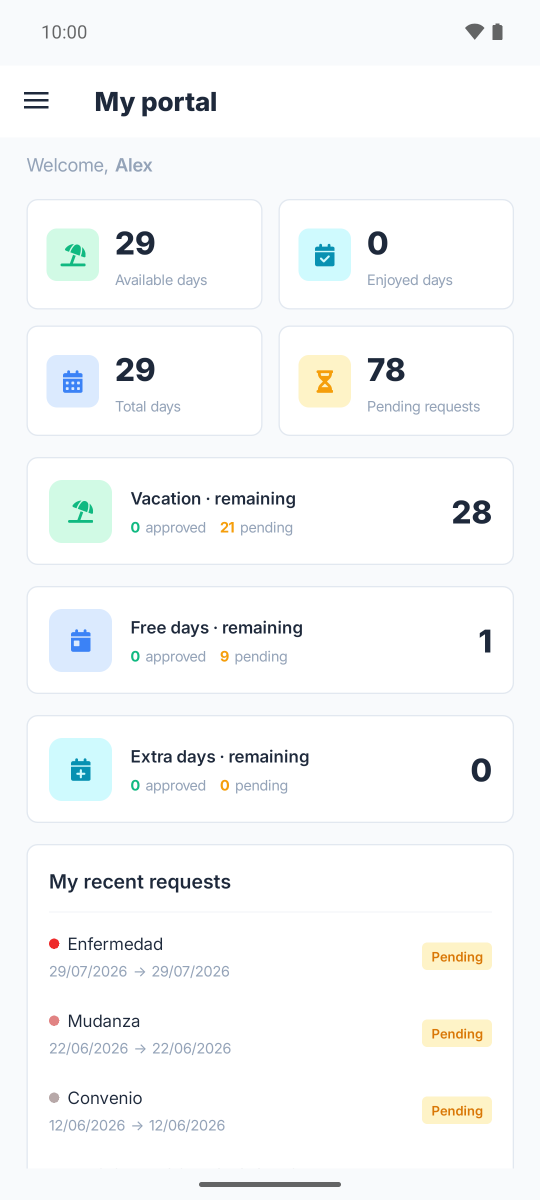
After signing in, My portal opens with a summary of your situation in the company:
Vacation days
Four indicators: available days, enjoyed days, total days and pending requests.
Balances by type
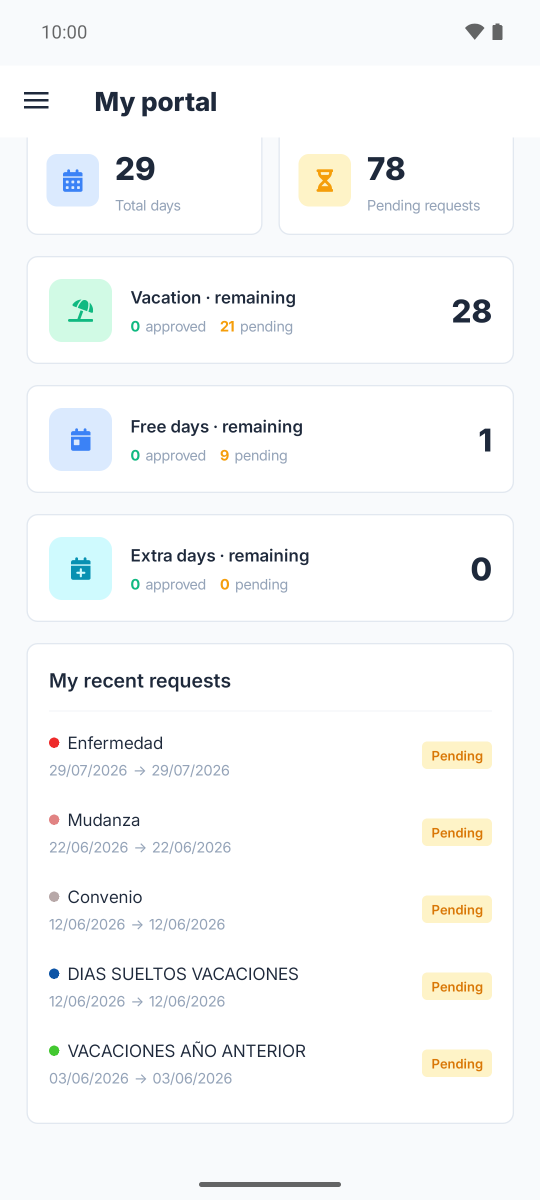
The days you have left of vacation, free days and extra days, with how many are approved and how many are still pending approval.
My recent requests
The latest requests you have sent, with their type, dates and status (Pending, Approved or Rejected).
3. The menu
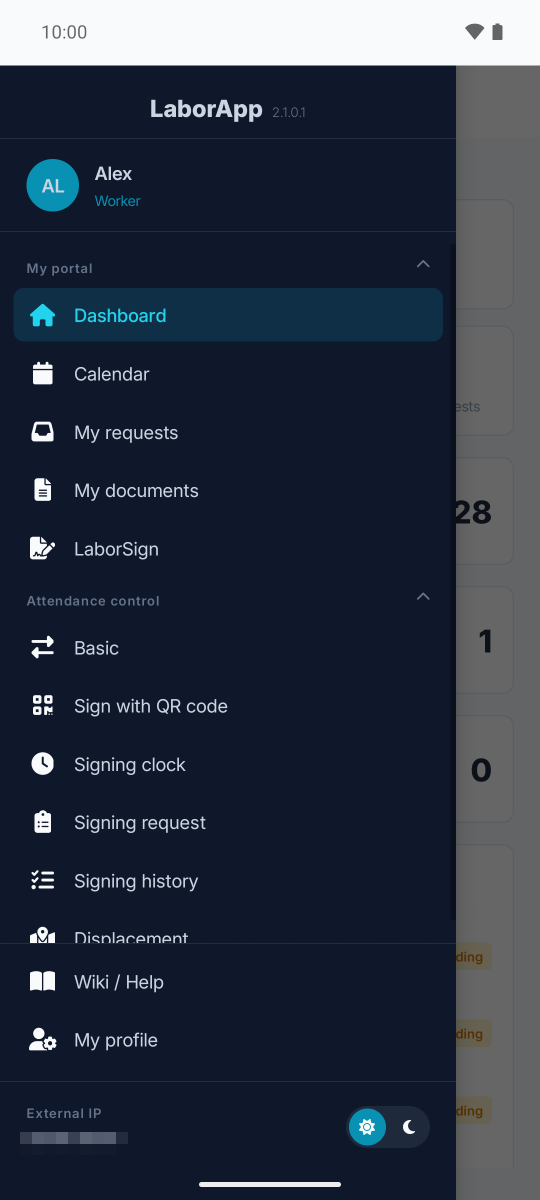
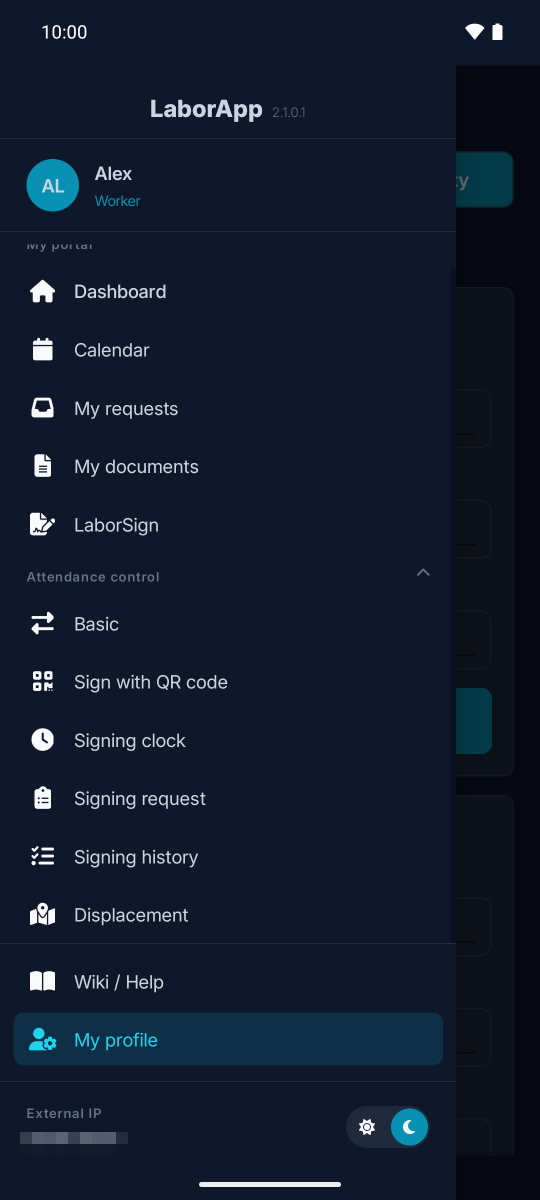
Tap the icon in the top left corner to open the side menu. Your name and role appear at the top; below them, the screens grouped in two sections:
| Section | Screens |
|---|---|
| My portal | Dashboard, Calendar, My requests, My documents and LaborSign |
| Attendance control | Basic, Sign with QR code, Signing clock, Signing request, Signing history and Displacement |
At the end of the menu you will find Wiki / Help and My profile, the external IP you are connecting from and the light / dark theme switch.
4. Calendar
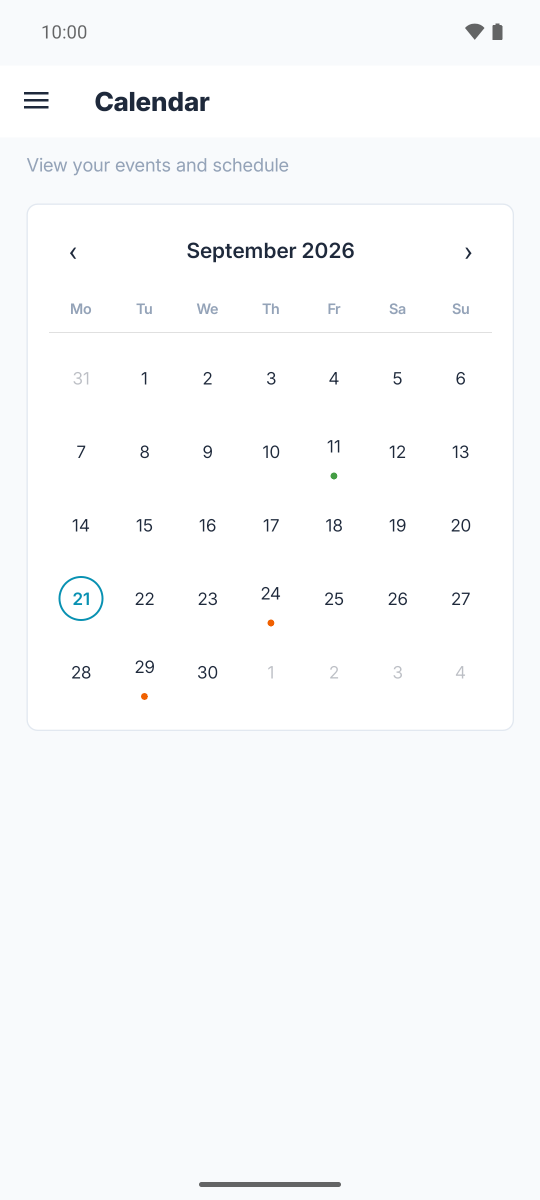
View your events and schedule
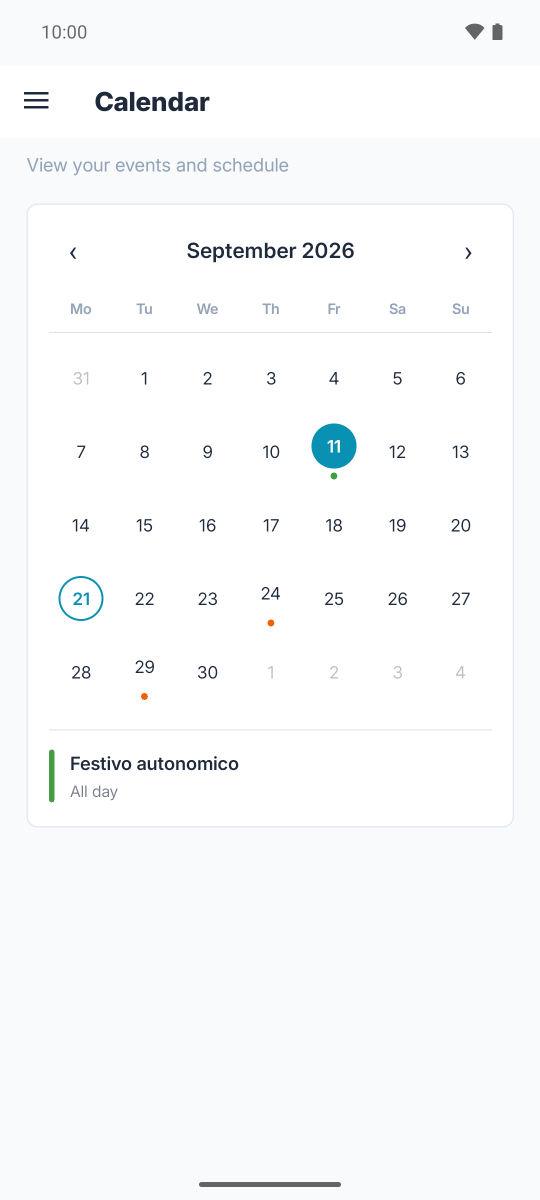
Change month with the arrows. Today is circled and days with something to look at carry a coloured dot.
Tap a day to see its events below: public holidays (national, regional or local), leaves and vacation, each with its colour and its time or "All day".
5. My requests
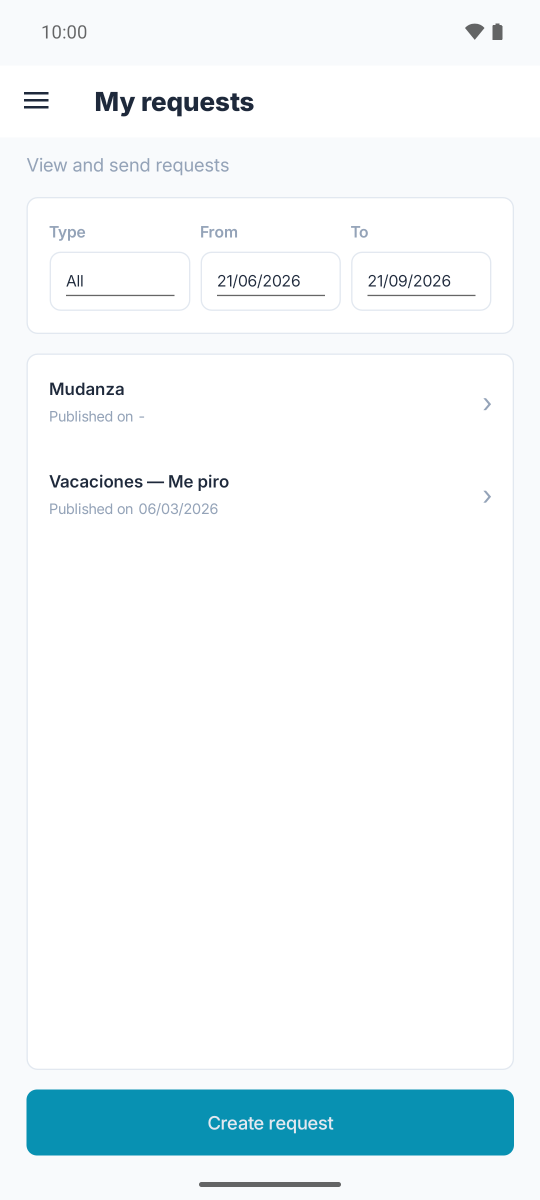
Browse
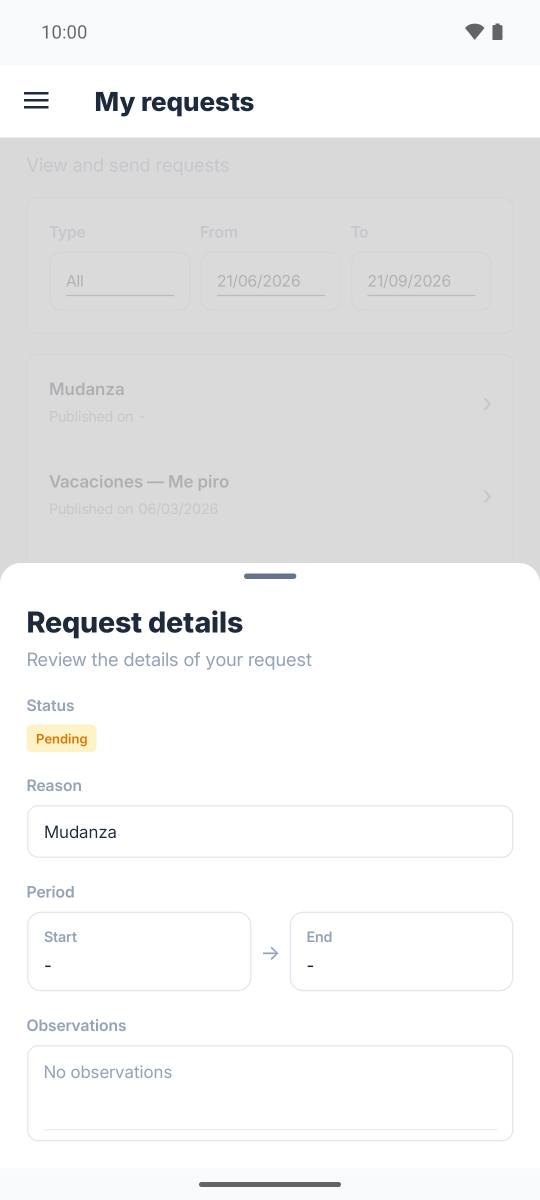
The list is filtered by Type (all, approved, denied or pending) and by From and To dates. Tap a request to open its details: status, reason, period, the company's resolution and observations.
Create request
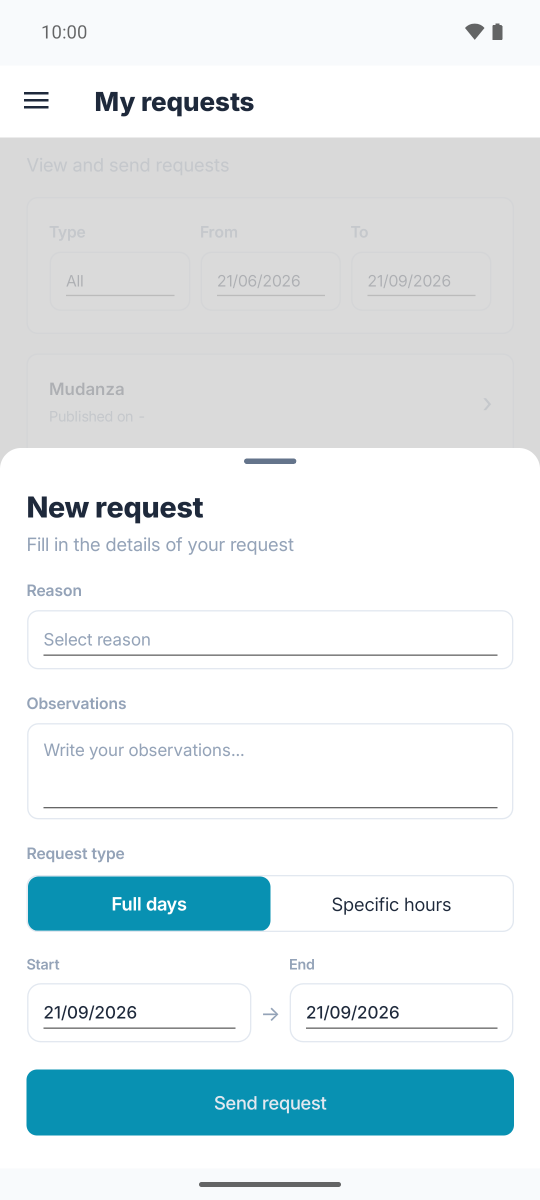
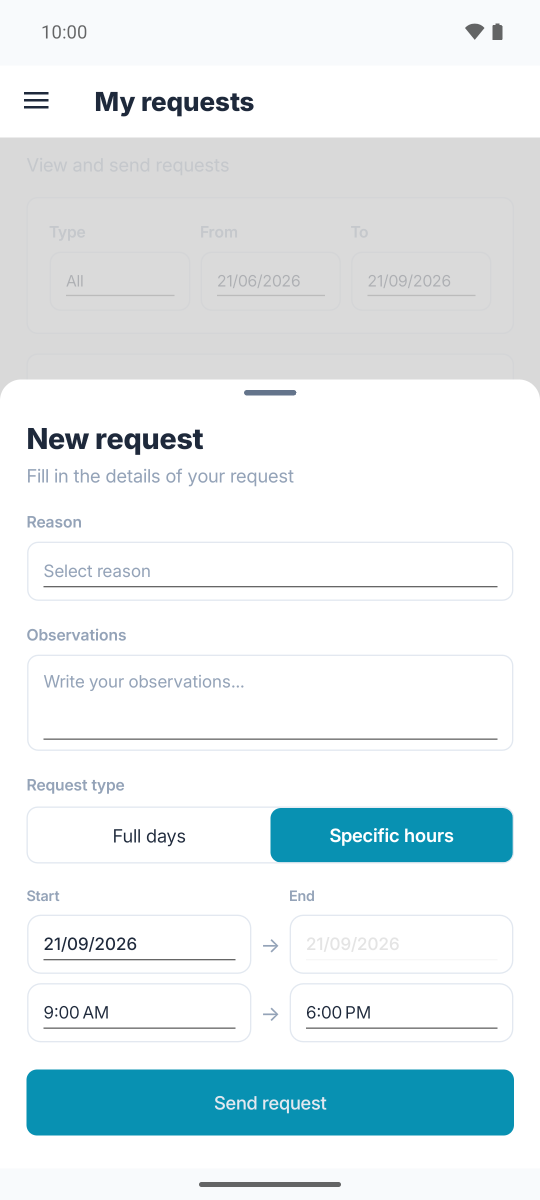
- Tap Create request
- Choose the reason (vacation, personal leave, sickness…) from the list defined by your company
- Write your observations if needed
- Indicate whether it covers full days (start and end date) or specific hours (one day with a start and an end time)
- Tap Send request
6. My documents
Browse the published documents
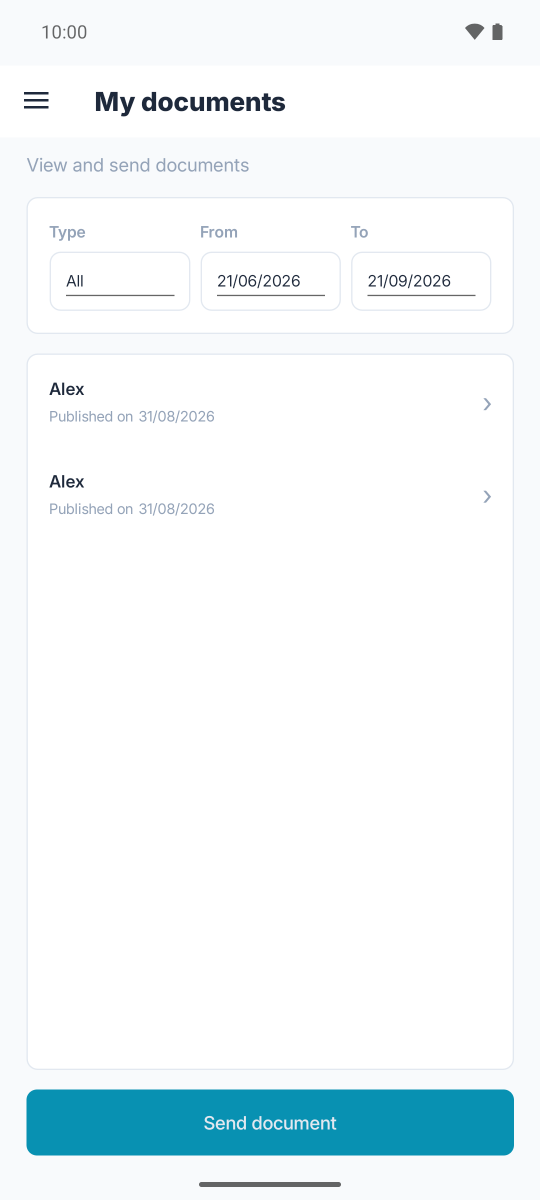
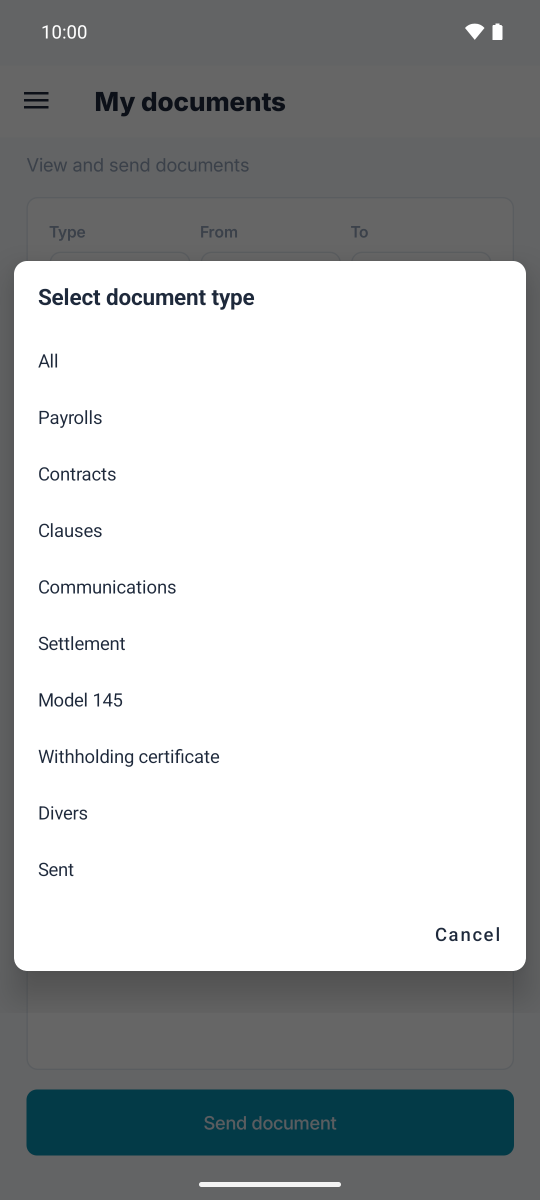
Here are the documents your company publishes for you: payrolls, contracts, clauses, communications, settlement, model 145, withholding certificate, divers and the ones you have sent. Filter by type and dates, and tap a document to open it with your phone's viewer.
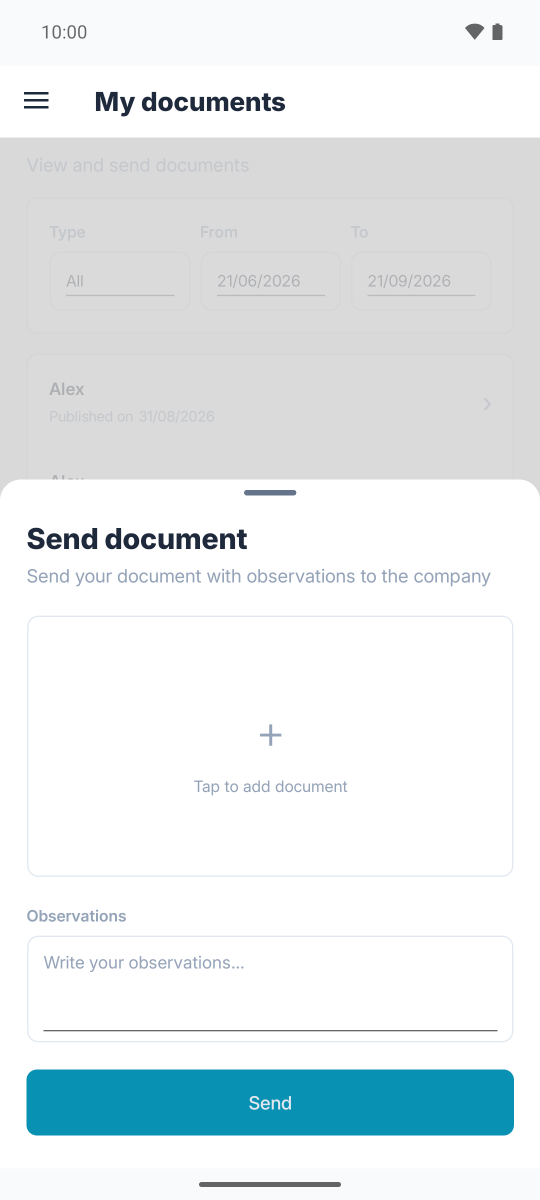
Send a document to the company
- Tap Send document
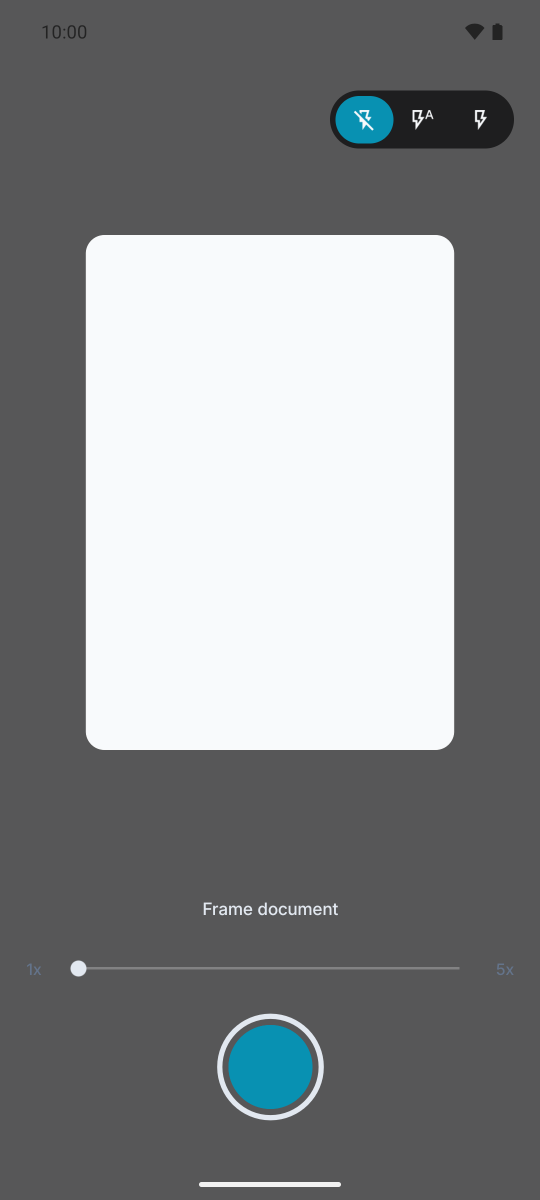
- Tap Tap to add document and photograph it: frame the document inside the box; you can change the flash mode and zoom in
- Describe the content in Observations
- Tap Send
7. LaborSign: document signing
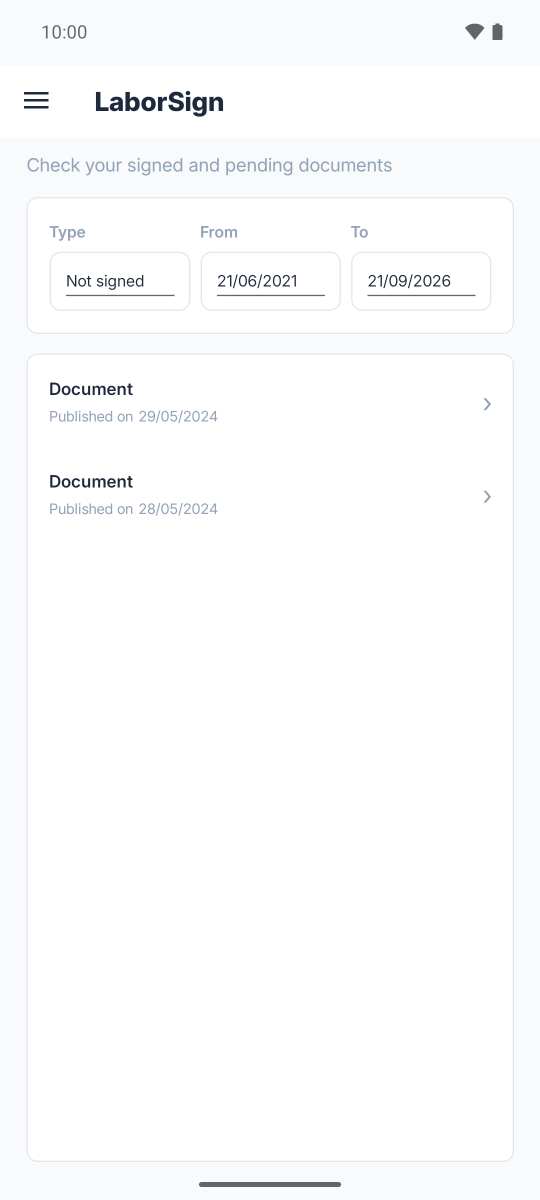
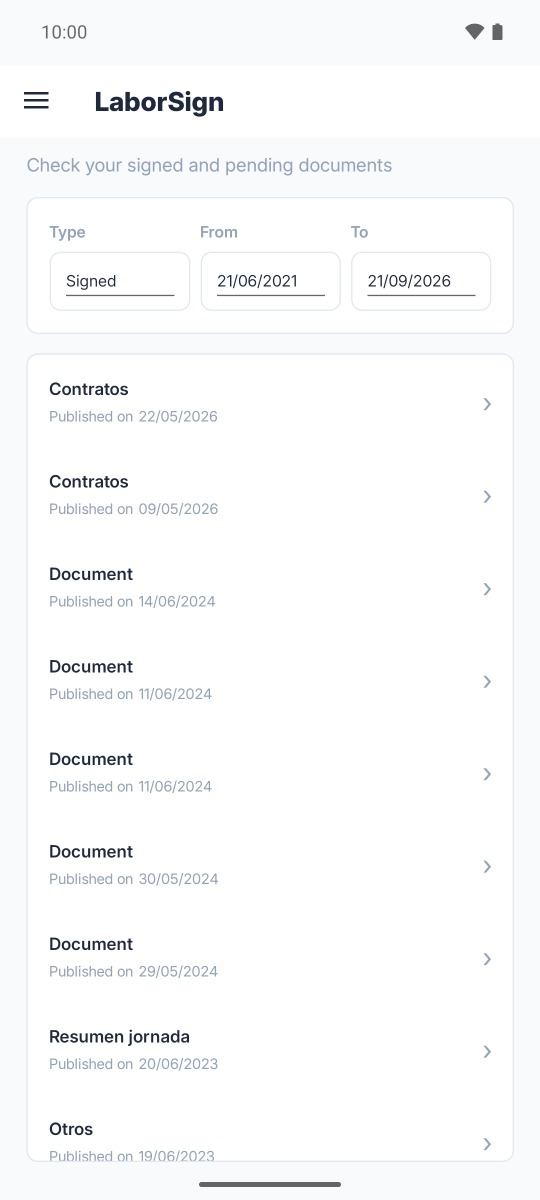
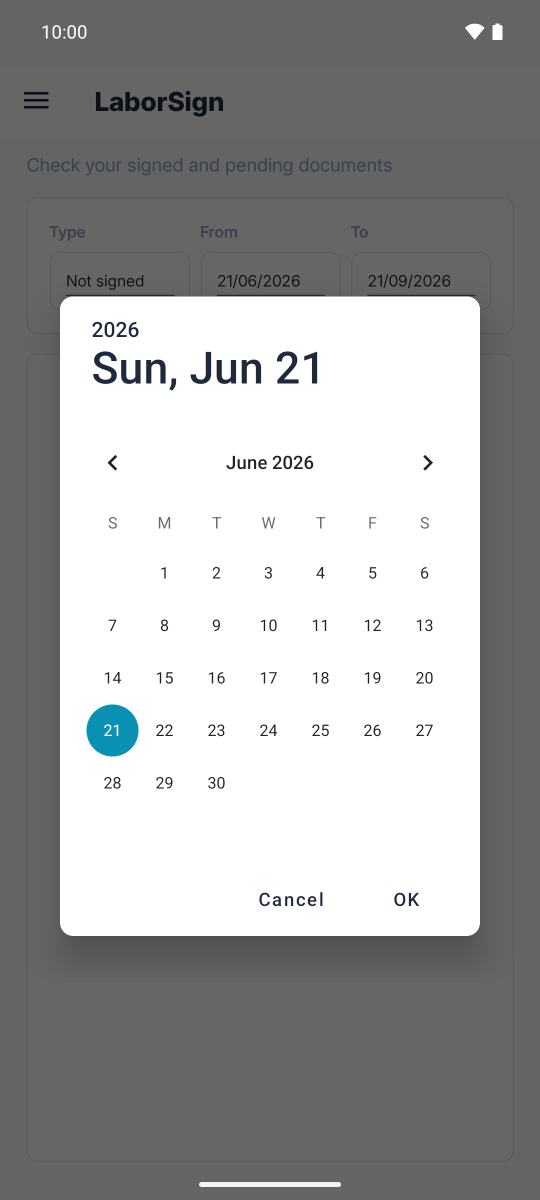
LaborSign gathers the documents your company sends you to sign. The Type filter separates the signed ones from the not signed; the From and To dates narrow the list.
Sign a pending document
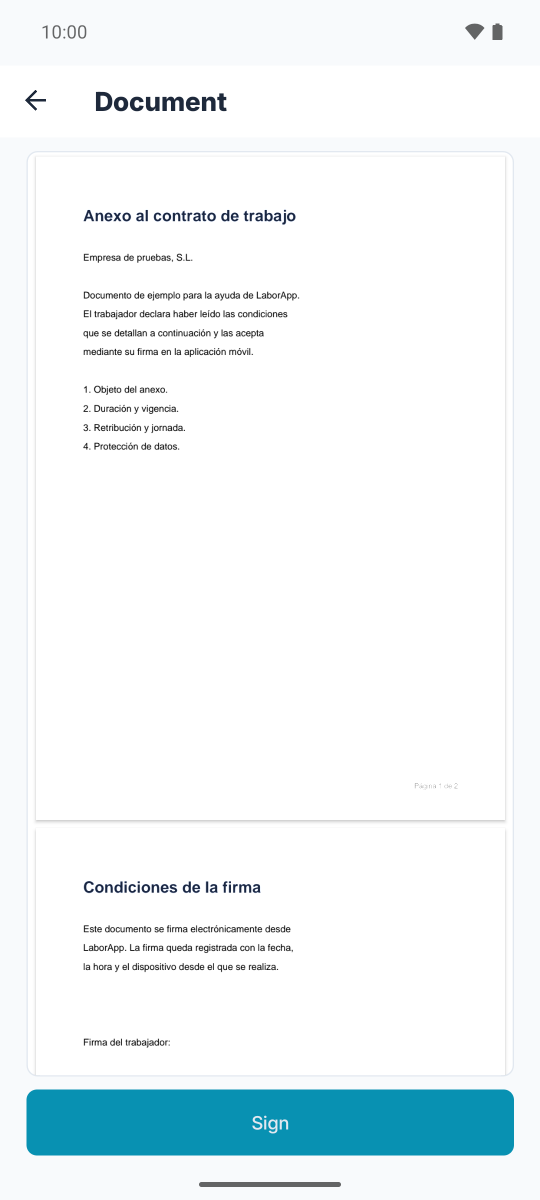
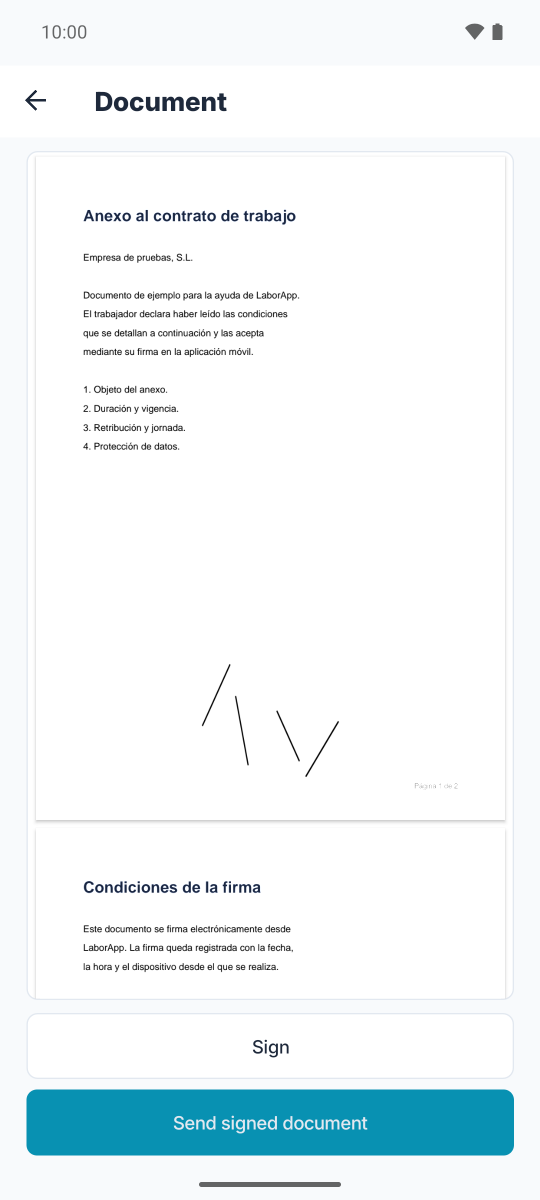
- With the filter on Not signed, tap the document: it opens in the application's signer
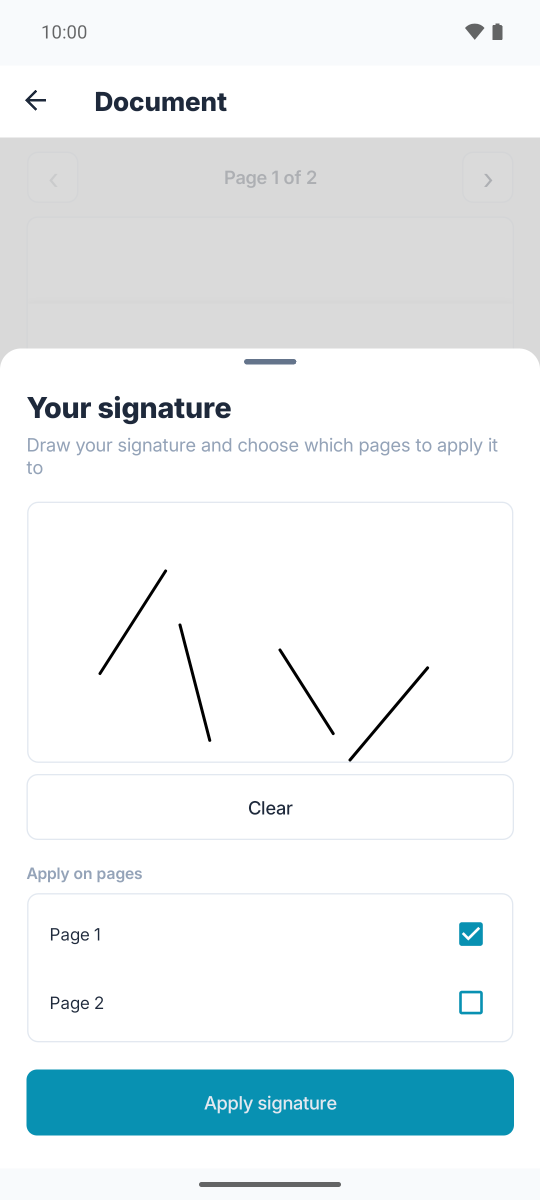
- Tap Sign and draw your signature with your finger on the pad; Clear wipes it to start again
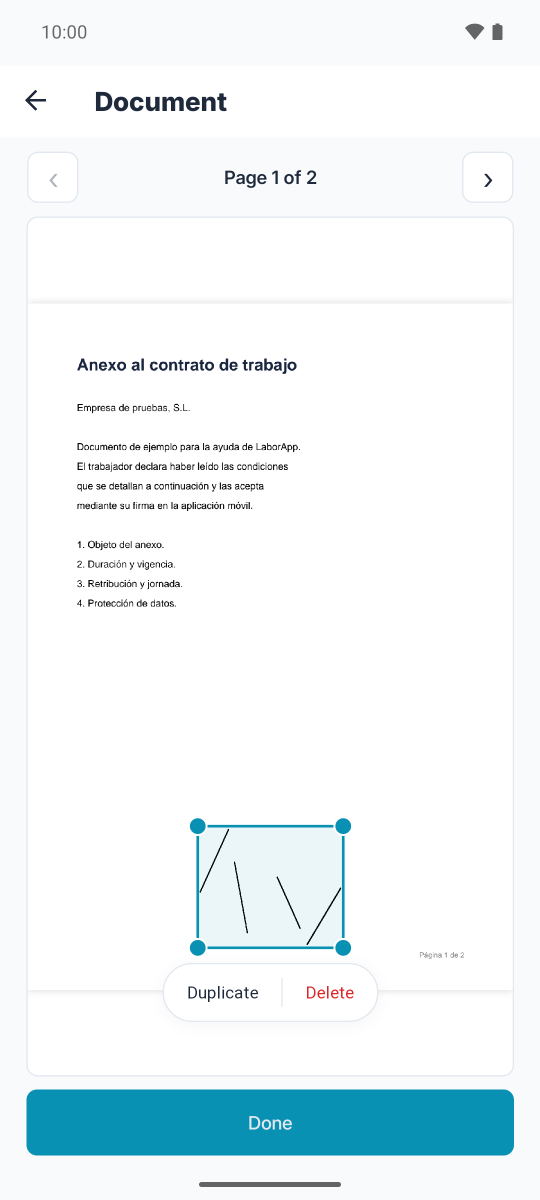
- Choose which pages to apply it on and tap Apply signature. On the page you can move it, resize it with the handles, duplicate it or delete it
- Tap Send signed document
View a signed document
With the filter on Signed, tap the document to open it with your phone's viewer.
8. Attendance control
The Attendance control section of the menu groups the ways of clocking in and the review of your signings. Which ones are offered depends on the signing profile your company has assigned to you.
Basic
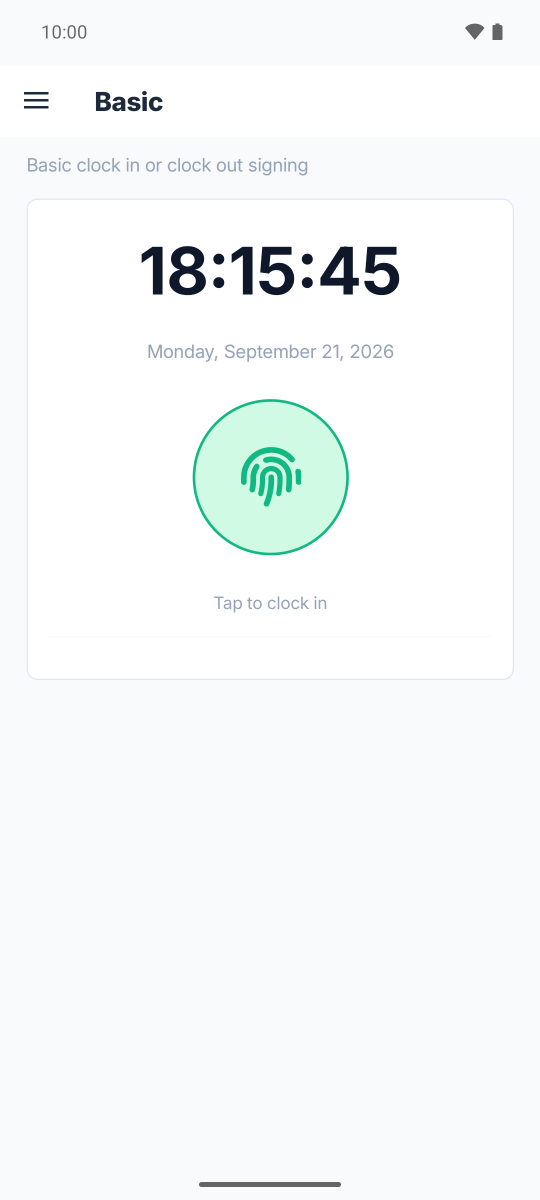
Clock in and out with a single tap. The screen shows the time and date; tap the round button to clock in, and tap it again to clock out. The day's records are listed below.
- You must wait 1 minute between two signings
- If the company restricts clocking to certain connections, the application checks your IP address before recording and warns you if it is not allowed
Sign with QR code
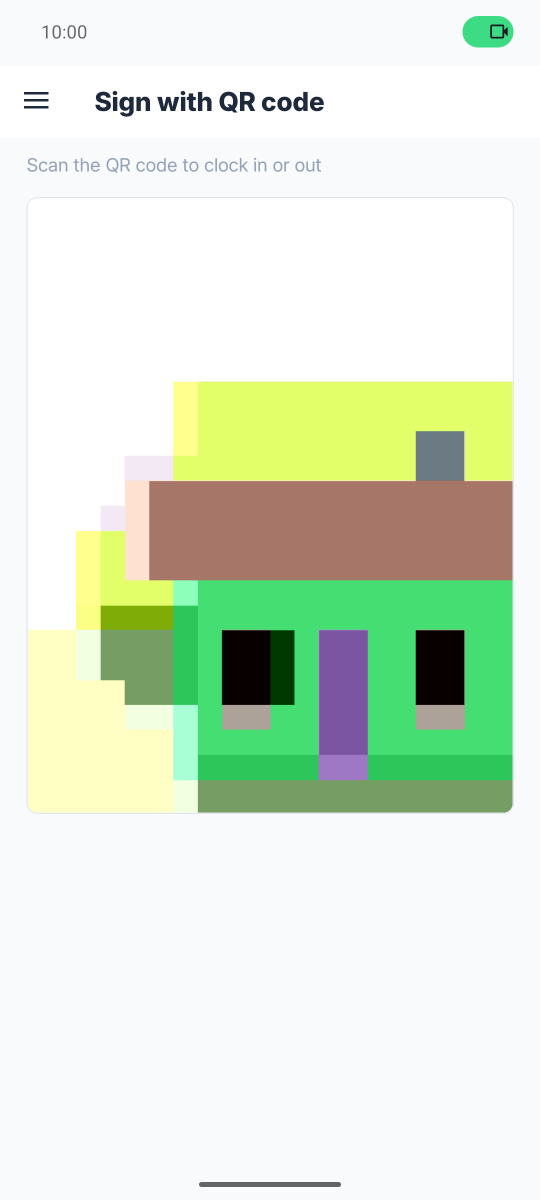
Scan with the camera the QR code the company displays at the workplace. Once detected, the application asks which type of signing you want to make (clock in or out) and sends it.
Signing clock
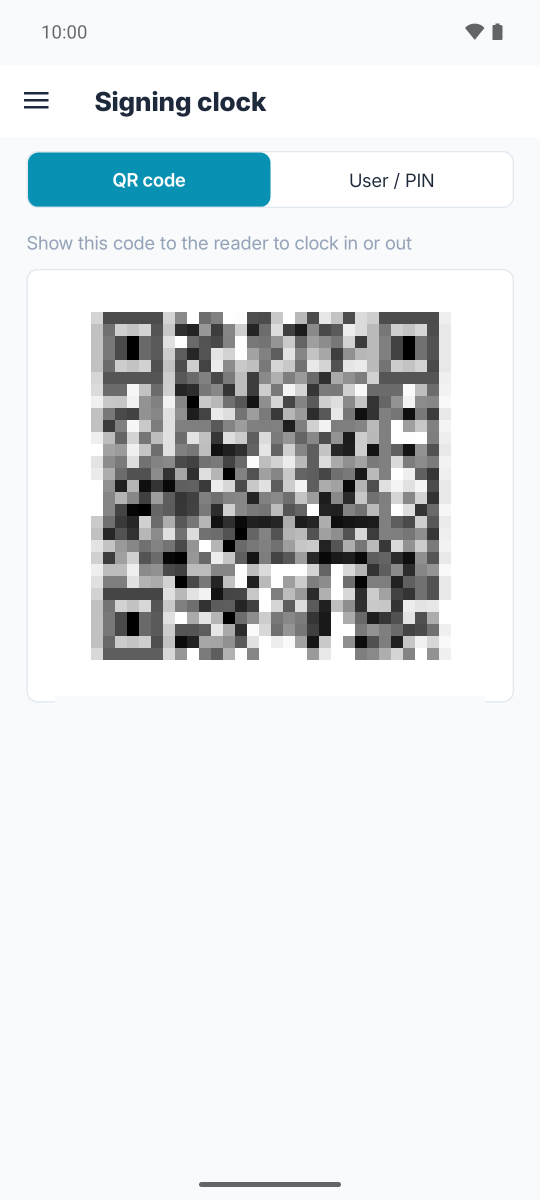
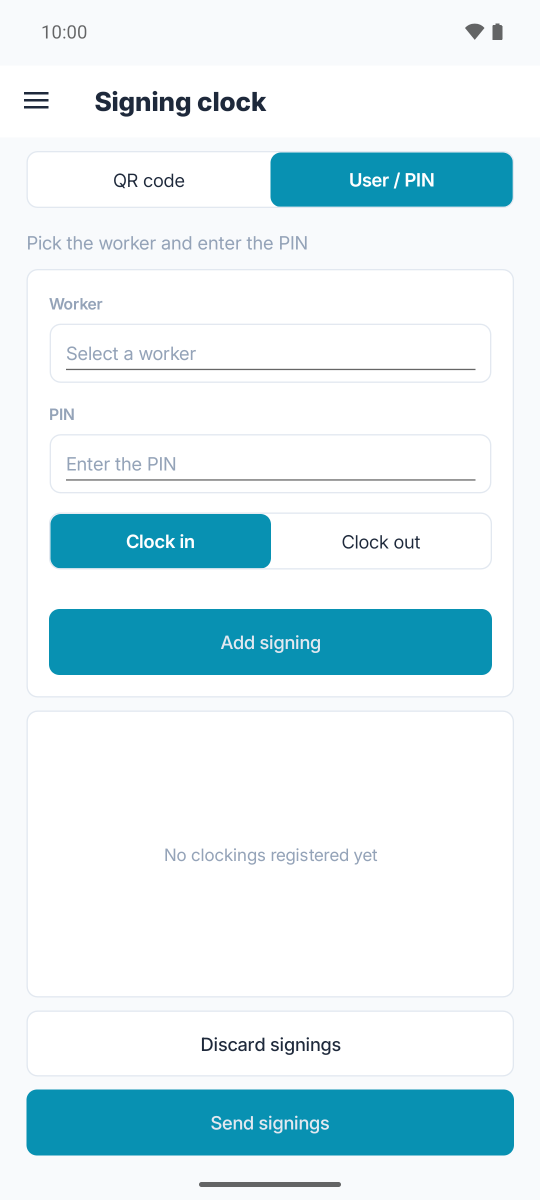
Turns the phone into a signing terminal for several workers. It has two tabs:
- QR code: shows a code that the company's reader scans to clock you in or out
- User / PIN: select the worker, enter their PIN, choose Clock in or Clock out and tap Add signing. The signings pile up in the list; Send signings records them all at once and Discard signings clears them
Signing request
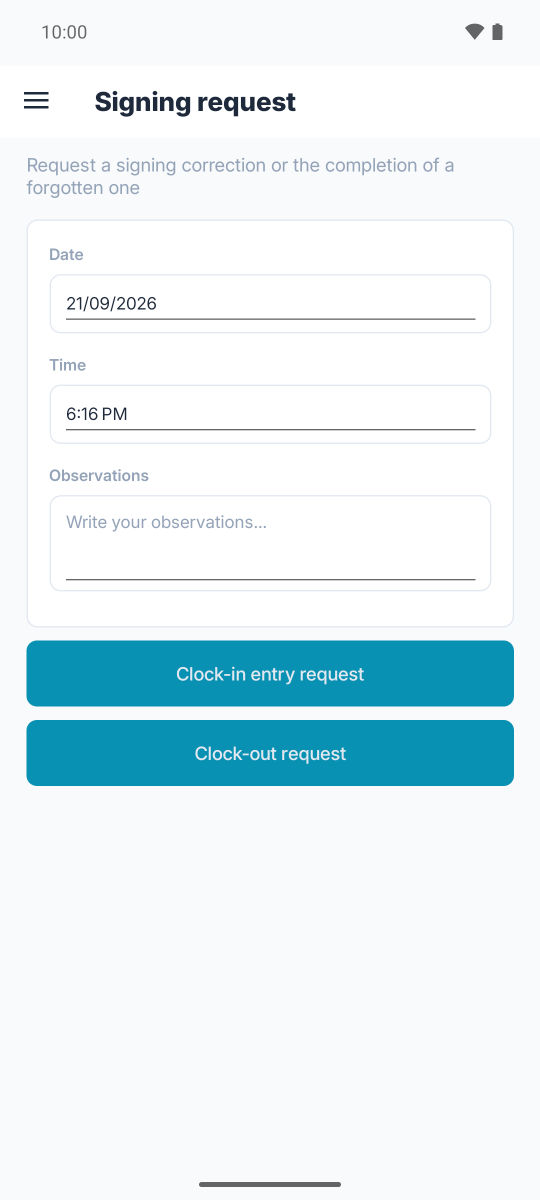
To ask for the correction of a signing or to record one you forgot: enter the date, the time and some observations, and tap Clock-in entry request or Clock-out request. The company reviews and applies it.
Signing history
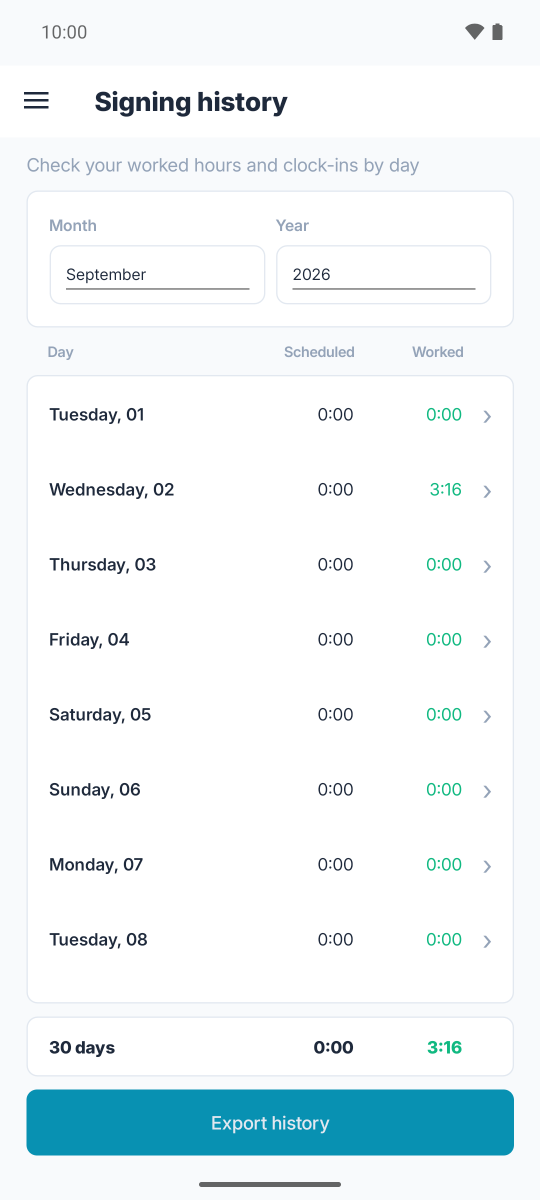
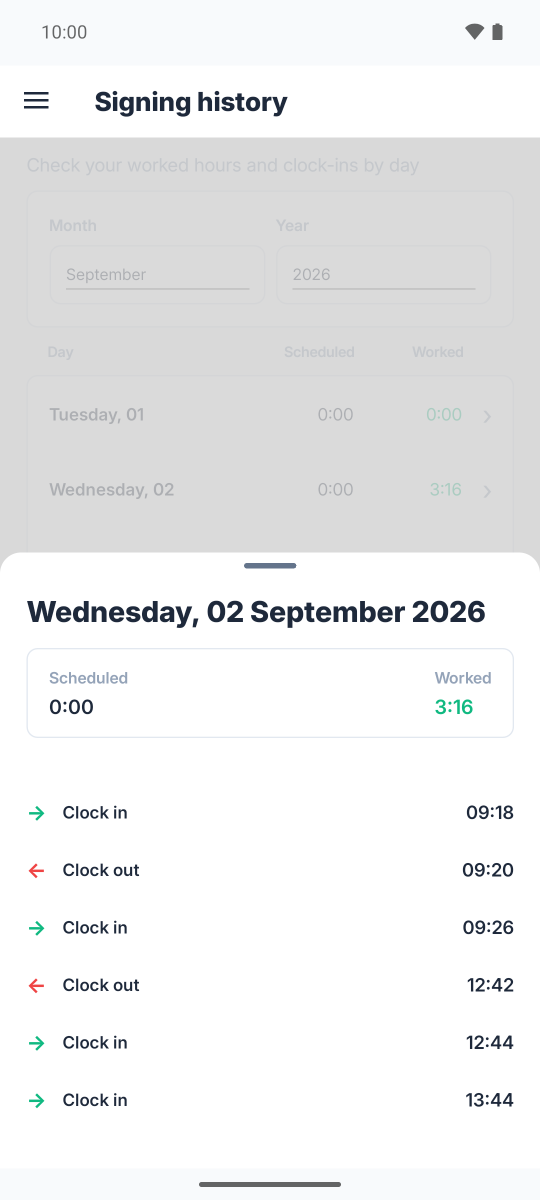
Choose the month and year to see, day by day, the scheduled working day and the hours worked, with the month's total at the bottom. Tap a day to see its clock-in and clock-out signings.
- Confirm hours: once the company has closed and recalculated the month, this button appears so you can approve the monthly record
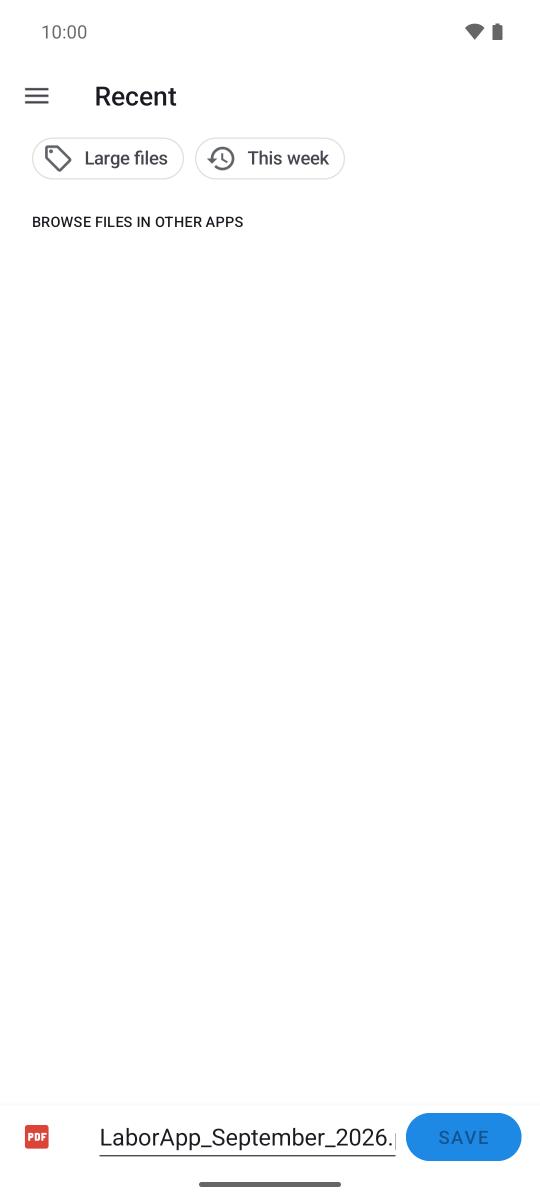
- Export history: generates a PDF with the month's summary and lets you save it on the phone
Displacement
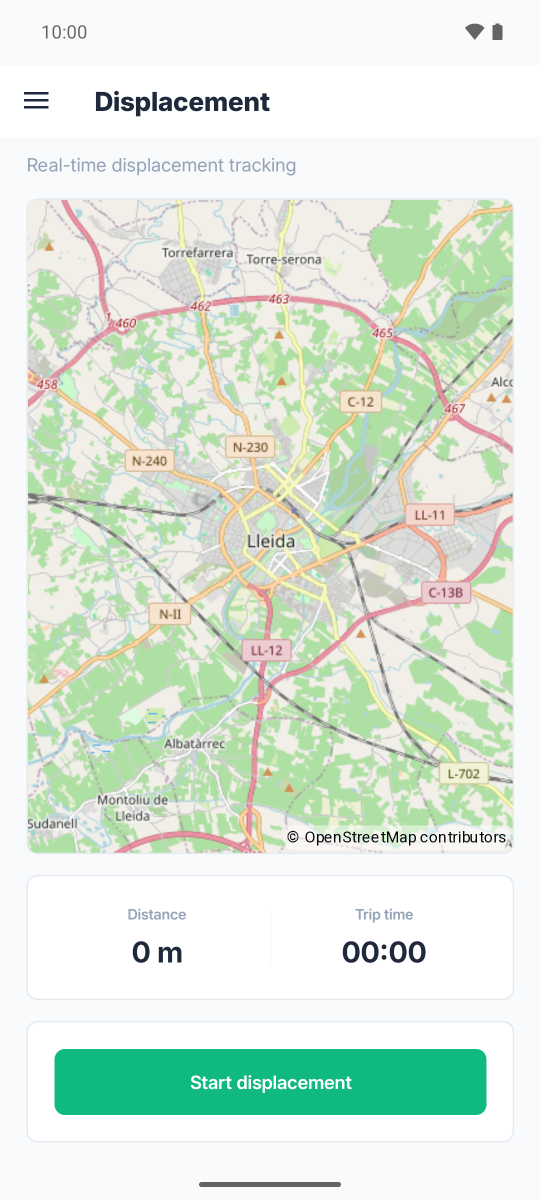
Recording of customer visits and work trips. Tap Start displacement and the application tracks your route by GPS on the map, counting the distance and the trip time; while it lasts, a notification reminds you that tracking is active. When you arrive, tap End displacement.
9. My profile
Profile
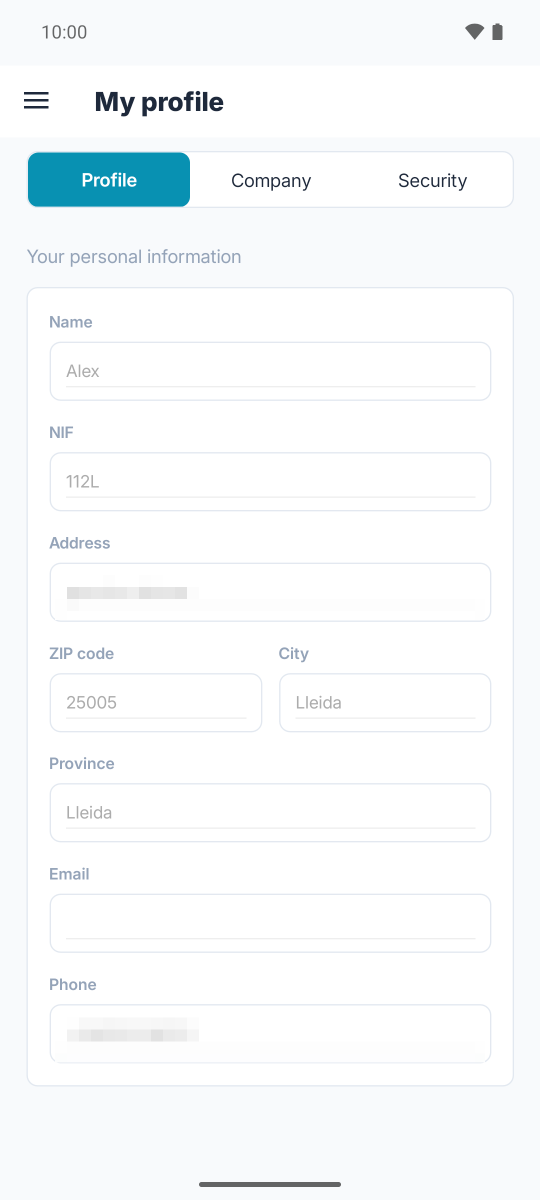
Your personal data as recorded by the company: name, NIF, address, postcode, town, province, email and phone.
Company
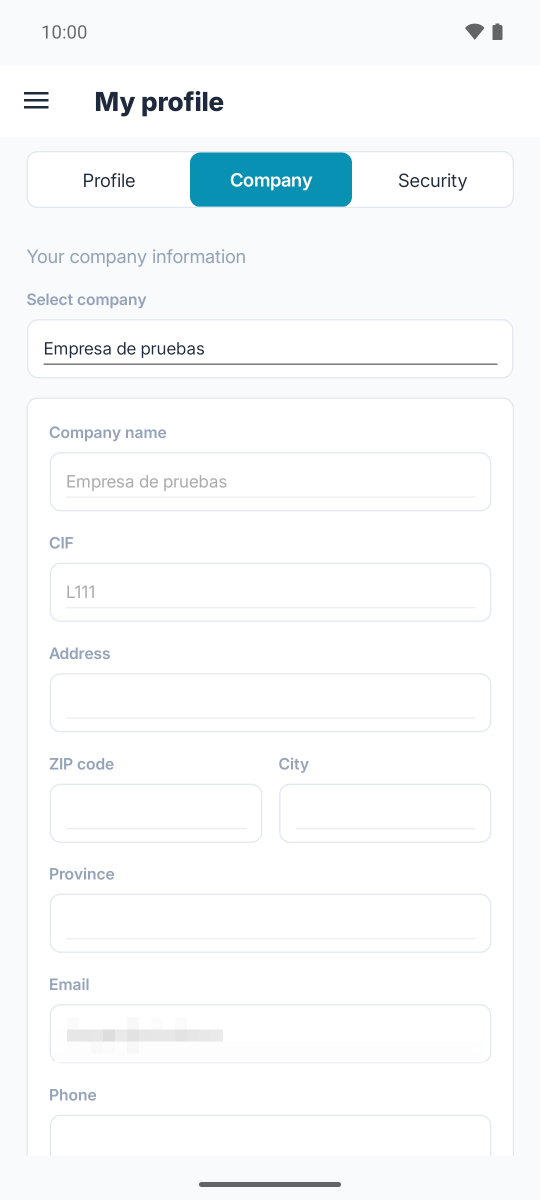
The data of the company you are working in. If you belong to several, the Select company drop-down lets you switch between them: the dashboard, requests, documents and signings become those of the chosen company.
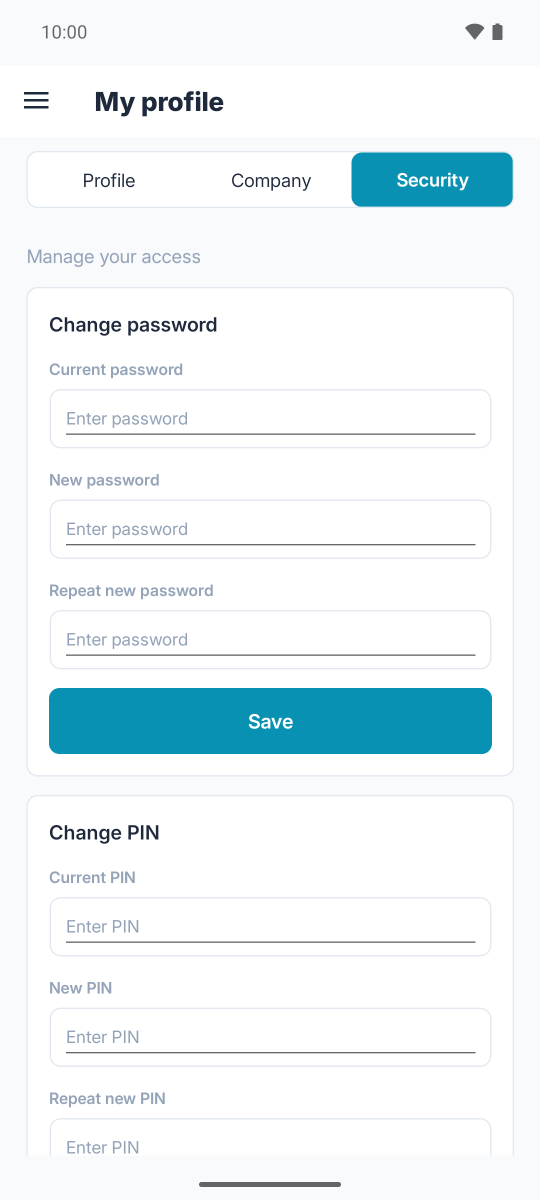
Security
Change password (the current one, the new one and its repetition) and Change PIN, the code you use in the signing clock and on the terminals.
10. Wiki / Help
The Wiki / Help entry of the menu opens this very help center in the phone's browser.
Not using LaborApp yet?
We'll show you how it works for your case, no strings attached. The form is in Spanish.